| |
Jae
/ iCE - Hair Tutorial
I should first mention that
all of these pictures look brighter in Photoshop than they
do in Netscape, so to see everything well, you might want
to turn up the brightness on your monitor.
Doing hair really isn't complicated at all, once you realize
whats going on. I used to make big, fat strands of hair,
and not very many of them, but hair is fine and should be
done with a small airbrush. The smaller the better.
I'll redo an old picture for this tutorial.
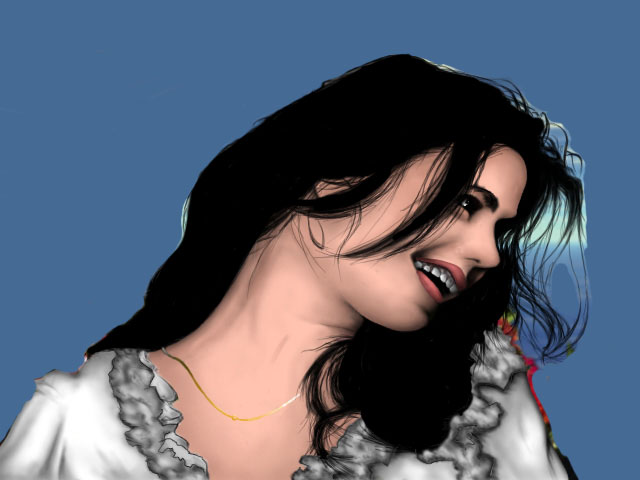
To start off with, you should have your outline/sketch and
you should fill in the hair area with black. Having the
entire sketch on a black background helps with shading in
general and not just with hair. It might help to hit CTRL-I
in Photoshop to invert the colors in your sketch and change
it to white outlines on a black background. (This only really
works well if you have a white background and black outlines.)

I should also mention that I'm a heavy user of layers. You
could either fill your hair with black on the main sketch
or do it on a seperate layer and just follow your outlines.
If you add the black on a seperate layer you should click
off the 'Preserve Transparency' option in the Layers palette.
Now the actual painting starts.

First you should decide what color you will be doing the
hair. If you're making it blonde, you should pick a color
that is darker than the main hair color to start with. On
your seperate layer with the hair area defined in black,
you should pick a darker brown color and using an airbrush
at about 30-40% pressure with a slightly larger brush size,
just follow the outlines of the hair and define some of
the directions in which the hair flows. Hair just curls
all over the place so there really isn't too many ways that
you could do this wrong. Having the 'Preserve Transparency'
option turned on helps alot here. You can't go outside the
borders of the black that you laid down for the hair. So
you can go through here faster than you normally could.

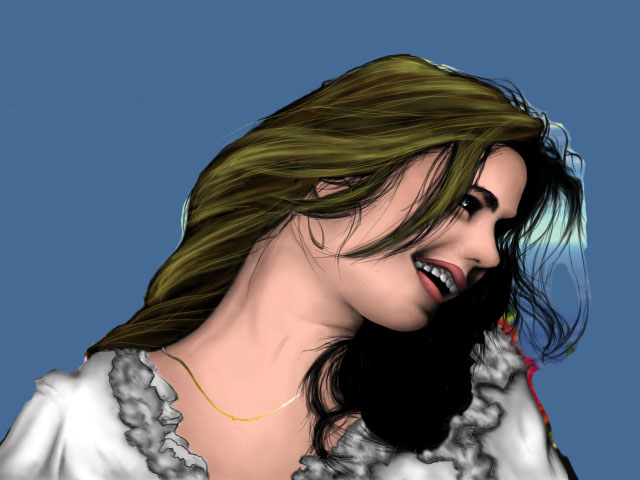
After getting some of the basic color down, you might want
to thicken it up some. so use a bigger airbrush and fill
in certain areas of the hair. You want to lighten the black
areas, but not get rid of them completely here. This area
can be a little rough. You don't want this area to be really
highly visible, you just want there to be an indication
of darker colored hair under the highlights.

The next step would have to be to create a new layer and
add your highlights on this layer. Pick a lighter yellow
color for this layer and with the single pixel airbrush
turned up to about 30-40% pressure go in and put in the
individual hair strands on top of the darker color. Use
the dark brown as a guide for adding the lighter colored
hair. Having a few misplaced hairs here and there helps
make it look more real.

Next what you want to do is use a bigger airbrush and thicken
the lighter color up just like you did with the darker color.
Be more careful with this than the darker color though,
you don't want thick yellow streaks of color showing here.
You just want to give the illusion of alot of hairs clumped
together in a big curl. It might also be helpful to lower
the pressure some on your airbrush so you can build up the
color to where you want it. Use more than one sized airbrush
to really make it look nicer than having only 1 hair stroke
size.

Next you will probably want to go back to your previous
layer and add some more dark in the spaces in between the
yellow on the above layer and add some white highlights
on top of the yellow on your 2nd layer. Just keep doing
this until you're satisfied with how your hair looks.
The hair color in this tutorial is a little more yellow
than it really should be. For blonde, it should really be
a little closer to your actual skin color. More peach than
yellow I guess. I should also mention that this was a rough,
quick tutorial on how I do hair. The example .JPGs might
not look great, but they were compressed more heavily than
usual to make the tutorial a faster download. Every step
that I use in doing my hair is listed here on this page.
It doesn't take alot of time to do hair as some people believe,
but you do want to take some time to make it look really
nice. Don't be in a rush to get it done. I should also say
that lighter colors like blondes tend to come out alot nicer
looking than darker colors. Black for example with gray/white
highlights. Or maybe its because when I did this picture
originally, I didn't add enough highlights to the hair to
clump the individual hairs together. Anyways have fun. If
theres something else you would like to know, email me.

Tutorial by Jae/iCE.
Copyright © 1997

|